Post Production Workflow

Post Production Workflow
I'm after some editing tips to get the best out of my airshow photos and wondered what workflow people follow. Is it all Photoshop or do people use elements or lightroom? I've read the photography blog post but it's fairly basic so was looking for other ideas.

Re: Post Production Workflow
For what it is worth -
Import into Lightroom. Rename, add metatags and copyright information. Assign a preset when using the X-Pro1 images for sharpening purposes, (XTrans sensors need a different kind of sharpening when compared to other cameras.)
Go through every picture and Pick or reject. Delete all rejects.
Refine then go through every picture again, assigning a single star for so-so and two stars for interesting.
Go through all the twos, the and reassign the best to three stars.
Select all three star images, assign a colour profile.
Crop, check white balance. Adjust exposure, shadows highlights, whites and blacks. Sometimes adjust contrast and Clarity. Check for dust spots.
If I remember add more metatags.
I will do the HDR work in Lightrroom.
Export on a custom preset to Photoshop.
Remove distracting objects and other cloning.
Resize and sharpen with a High Pass filter, as a Smart Filter. Tweak the sharpening using a layer mask. (All done as an action)
Flatten (done as an action) and Save As.
Job done.

Re: Post Production Workflow
Sorry to break into this thread, but wallace, could you elaborate on this:
"Resize and sharpen with a High Pass filter, as a Smart Filter. Tweak the sharpening using a layer mask. (All done as an action)"
Perhaps be more precise on how to do that with an action? I'm doing everything manual one-by-one. I'm not a PS wizz (yet).
"Resize and sharpen with a High Pass filter, as a Smart Filter. Tweak the sharpening using a layer mask. (All done as an action)"
Perhaps be more precise on how to do that with an action? I'm doing everything manual one-by-one. I'm not a PS wizz (yet).
| Erlanger Bergkirchweih | RIAT 2023 | Belgian Airforce Days 2023 | Frysian Flag 2023
Re: Post Production Workflow
wallace wrote:Try this.... https://squawking7000.wordpress.com/bei ... harpening/
Thanks wallace, I knew about this link and method, but as he is saying too...how to make actions is the question!
| Erlanger Bergkirchweih | RIAT 2023 | Belgian Airforce Days 2023 | Frysian Flag 2023
Re: Post Production Workflow
Actions themselves. I would suggest having a look on Youtube for that as I just bluster through.
I have slightly changed my style a little, so I'd thought that I would share it.
Open up picture in Lightroom (or Adobe Camera RAW).
Add colour profile as required. (I use a lot of custom colour profiles.)
Adjust the Exposure slider until the right hand peak of the Histogram gets near the right hand side. Typically it will stop somewhere under the numbers. (I have the EXIF exposure info showing under the Histogram.) Adjust till the peak starts bunching up or you start to loose contrast.
Adjust or restore contrast.
Adjust the white slider till you get 100% on the Histogram or clipped highlights. You may have to come and go a little with specular highlights.
Adjust the Black slider to get 0% on the Histogram.
Adjust the Shadow slider to suit.
Adjust the Clarity as necessary.
I remember hearing something about the layout in LR was supposed to reflect how your workflow should go, working top to bottom and this workflow of mine seems to work like that.
The results may be a little too contrasty for some photographers preference. Personally I don't mind contrasty photos, but it may not be 100% suitable for a.net stuff. However it does seem to give whites in the 95% range or Zone IX, which is where they should be, which is good.
Re: Post Production Workflow
Thank you very much for the additional info Wallace. I will check that out as well.
| Erlanger Bergkirchweih | RIAT 2023 | Belgian Airforce Days 2023 | Frysian Flag 2023
Re: Post Production Workflow
Would it be possible to see an "out of camera" vs. edited versions of an image that you've applied your workflow to Wallace? It'd be really helpful for me, and I'm sure others, to be able to see how the finised product looks? :
Thanks!
Thanks!
Re: Post Production Workflow
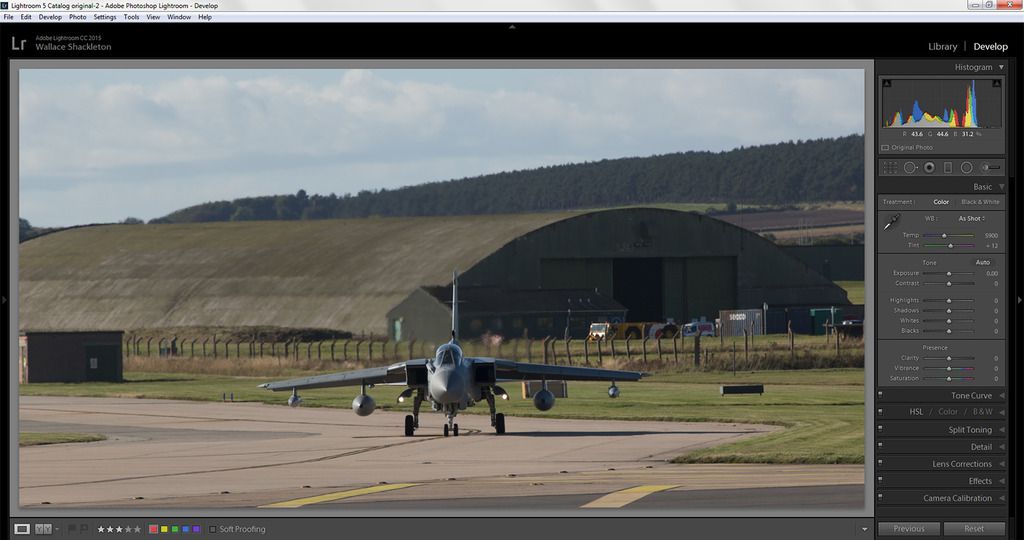
I hope these two may be suitable. It's not a fail safe "killer" workflow just mine. You'll see the differences in the histograms.
Both are cropped exactly the same, mainly to get rid of much of the boring foreground.
This is the original, straight out of the camera (and cropped)
This is the edited version. Note that I also applied a custom colour profile hence the slight shift, mainly in the greens. Also I made a custom white balance as well
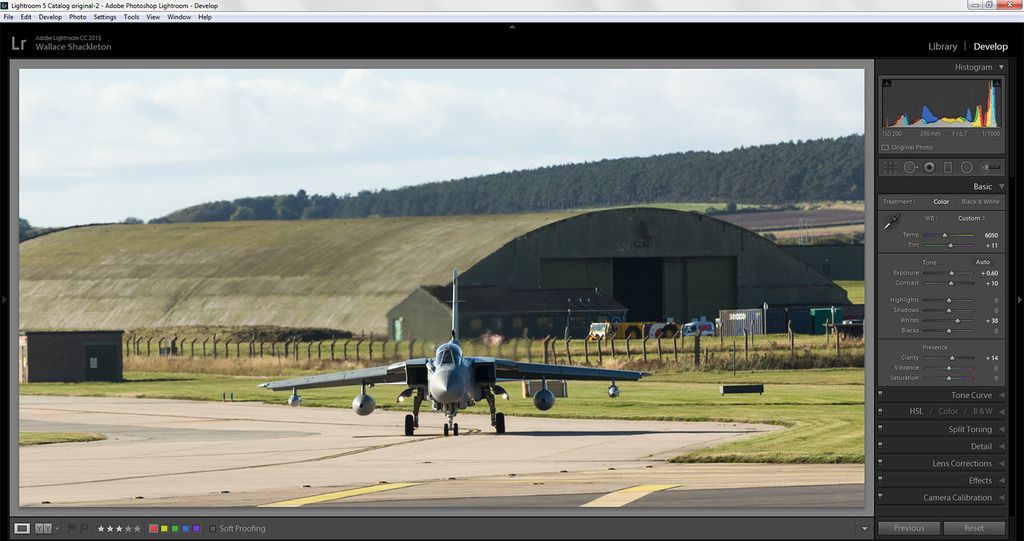
For the record, this was shot using manual exposure 1/1000 at F/6.7 200ISO. On good days, I mainly use manual as the light does not change that much between shots and it gives me something to thing about other than pressing the shutter button.
In Post script, just one last thing. The original looks drab possibly because I use Camera Faithful as my default style. I prefer to be in full control rather than letting the camera apply a bias settings to the RAW image.
Both are cropped exactly the same, mainly to get rid of much of the boring foreground.
This is the original, straight out of the camera (and cropped)

This is the edited version. Note that I also applied a custom colour profile hence the slight shift, mainly in the greens. Also I made a custom white balance as well

For the record, this was shot using manual exposure 1/1000 at F/6.7 200ISO. On good days, I mainly use manual as the light does not change that much between shots and it gives me something to thing about other than pressing the shutter button.
In Post script, just one last thing. The original looks drab possibly because I use Camera Faithful as my default style. I prefer to be in full control rather than letting the camera apply a bias settings to the RAW image.
-
Weather Watcher

- Posts: 685
- Joined: Wed 18 May 2011, 12:40 pm
Re: Post Production Workflow
Thank you for sharing your workflow - most helpful.
Re: Post Production Workflow
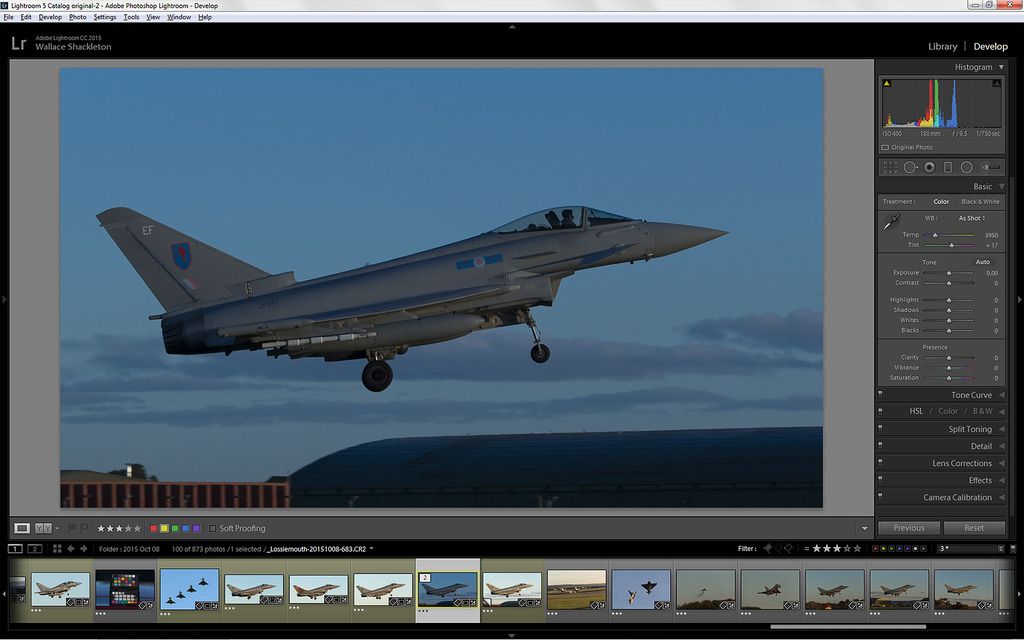
Working along a similar there is this one
The unedited original
and the edited final version
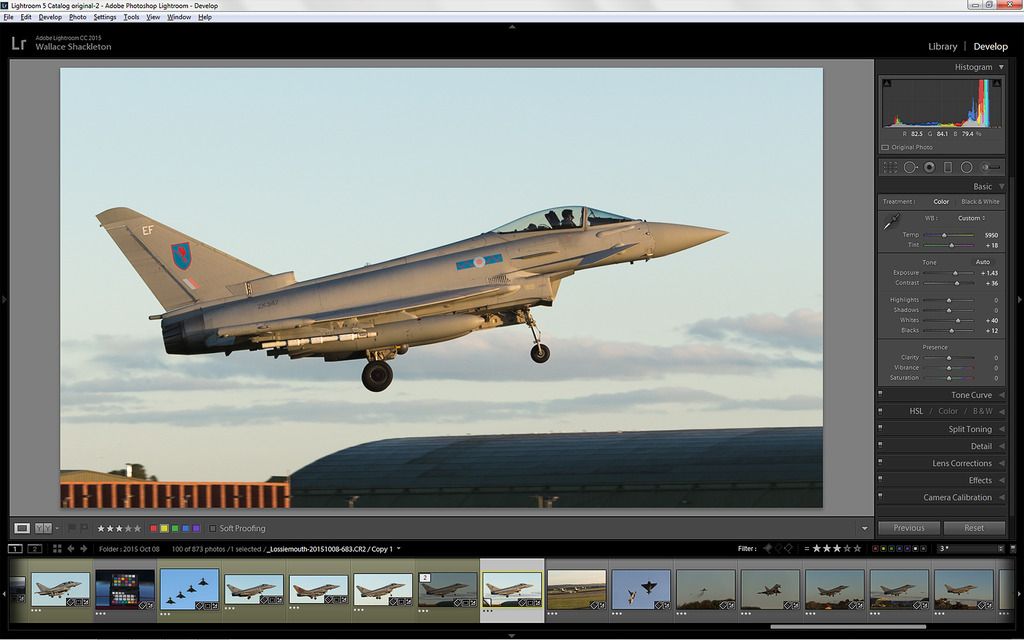
This was exposed at 1/750th, F/9.5 at 400ISO.
Looking at the exposure slider on the edited version, I have had to increase the exposure to one and half stops, which with hindsight tells me that I should have paid more attention and exposed to the right when I was taking the photos and saved myself a bit of effort in the process.
When you think about it, spending 30 seconds on every picture mounts up in time. There is a 100 photos in this selection, which is nearly an hours worth of editing time that could be better spent that sitting in front of a computer monitor!
Lastly, apart from the exposure, the one single thing that made the biggest difference to this photo was a custom white balance.
I hope this was of some use to you.....
The unedited original

and the edited final version

This was exposed at 1/750th, F/9.5 at 400ISO.
Looking at the exposure slider on the edited version, I have had to increase the exposure to one and half stops, which with hindsight tells me that I should have paid more attention and exposed to the right when I was taking the photos and saved myself a bit of effort in the process.
When you think about it, spending 30 seconds on every picture mounts up in time. There is a 100 photos in this selection, which is nearly an hours worth of editing time that could be better spent that sitting in front of a computer monitor!
Lastly, apart from the exposure, the one single thing that made the biggest difference to this photo was a custom white balance.
I hope this was of some use to you.....